How to Port Forward Traffic to a Remote IP Using Iptables
In the world of networking, you often find yourself in a situation where a vital service — like a Swagger API dashboard — is hosted on a server that isn’t directly reachable by everyone on your team. Whether due to subnet isolation, VPN restrictions, or firewall policies, these “network silos” can stall development and testing.
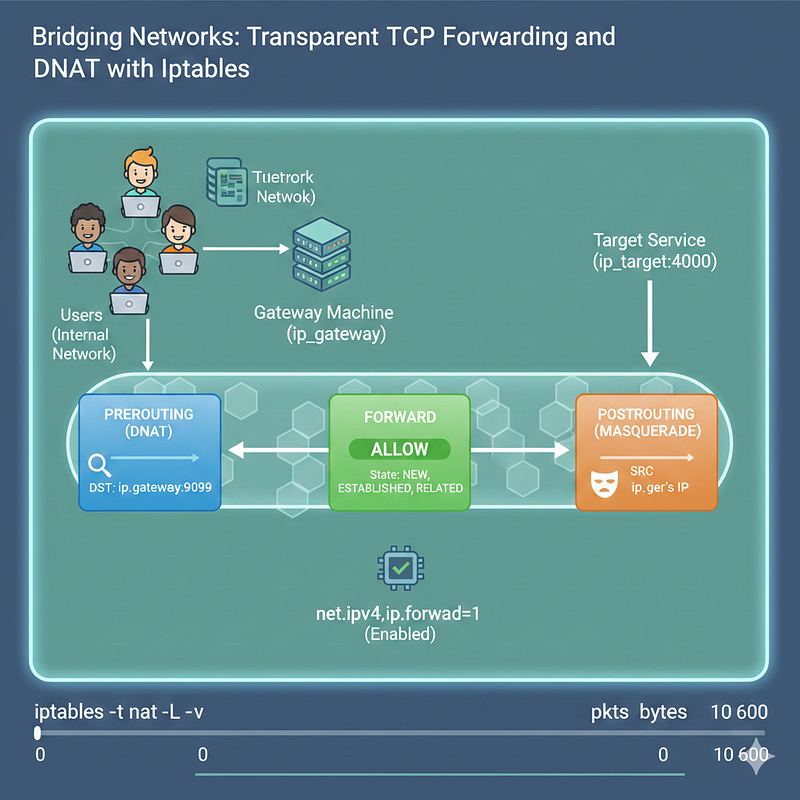
This article provides a step-by-step technical walkthrough on how to use iptables to turn a standard Linux machine into a transparent bridge. By leveraging Destination NAT (DNAT) and Source NAT (SNAT), you can map a local port on your gateway machine to a remote service, effectively “proxying” the connection at the kernel level for maximum performance and reliability.
The Scenario
- Target Service:
ip_target:4000(The "hidden" service you can access) like 10.100.100.10:400 - Gateway IP:
ip_gateway(Your machine's IP on the network). - Shared Port:
9099(The port users will use to reach the service).
Step 1: Enable Kernel-Level Forwarding
By default, most Linux distributions disable the ability to pass traffic between different network interfaces for security reasons. You must tell the kernel to behave like a router.
Check status: cat /proc/sys/net/ipv4/ip_forward
Enable it:
sudo sysctl -w net.ipv4.ip_forward=1Note: To make this permanent after a reboot, edit/etc/sysctl.confand uncomment the linenet.ipv4.ip_forward=1.
Step 2: Destination NAT (PREROUTING)
The PREROUTING chain in the NAT table handles packets as they first hit your network card. Here, we change the "envelope" of the packet: we swap your IP address for the target service's IP address.
sudo iptables -t nat -A PREROUTING -p tcp --dport 9099 -j DNAT --to-destination ip_target:4000What this does: Any TCP traffic hitting your machine on port 9099 is immediately redirected to ip_target on port 4000.
Step 3: Open the Firewall (FORWARD)
Even if the packet is redirected, the Linux firewall (Filter table) will drop it by default if your policy is set to DROP. You must explicitly grant permission for these packets to cross through your system.
# 1. Allow established connections back in
sudo iptables -I FORWARD 1 -m state --state
RELATED,ESTABLISHED -j ACCEPT# 2. Allow new requests to the target destination
sudo iptables -I FORWARD 2 -p tcp -d ip_gateway
--dport 4000 -j ACCEPTStep 4: Source NAT (POSTROUTING)
This is the most critical and often forgotten step. When the target service (ip_target) receives a packet, it needs to know where to send the reply.
If we don’t use MASQUERADE, the service will try to reply directly to the original user’s IP. Since the user never asked ip_target for anything (they asked you), their computer will reject the reply.
sudo iptables -t nat -A POSTROUTING -p tcp -d ip_target --dport 4000 -j MASQUERADEWhat this does: It “masks” the original user’s IP with your own gateway IP. The target service replies to you, and you safely pass that reply back to the user.
Step 5: Verification and Testing
To verify the rules are active, list the NAT table with line numbers and packet counters:
sudo iptables -t nat -L -n -v --line-numbersHow to Test
- Remote Test: From another machine on the network, try to reach the URL: http://ip_gateway:9099/swagger/index.html
- Monitor Counters: While testing, run
sudo iptables -t nat -L -n -v. If thepkts(packets) column increases, your traffic is successfully hitting the rule.
Conclusion
Mastering iptables for port forwarding is more than just running a single command; it is about understanding how packets flow through the Linux networking stack. By correctly configuring the PREROUTING, FORWARD, and POSTROUTING chains, you have successfully built a transparent bridge that bypasses network isolation without the overhead of a traditional proxy server.
Key Takeaways
- The Trinity of NAT: Forwarding requires three distinct actions: translating the destination (DNAT), permitting the pass-through (FORWARD), and masking the source for the return trip (MASQUERADE).
- Kernel Awareness: No amount of iptables rules will work if the kernel’s
ip_forwardsetting is disabled. - Visibility is Power: Using the
-v(verbose) flag to monitor packet counters is the most effective way to debug where a connection is being dropped.
With this setup, your gateway machine now provides a seamless entry point for your team, making the “hidden” Swagger UI at ip_target as accessible as any local resource. Just remember to save your rules using iptables-persistent to ensure your bridge survives the next system reboot.